Monday 28 June 2021

Puzzle Fun #1 - Calendar Relationships


Puzzle Fun #1:    Calendar Relationships


I began creating these puzzles at the beginning of the 2020 school year after a rookie teacher (They are the best because their ideas are fresh and new!) showed me how to make them. My students found them fun!  We worked on them together on my screen during my brick and mortar months and then when I went virtual, the children started working on them on their own.  

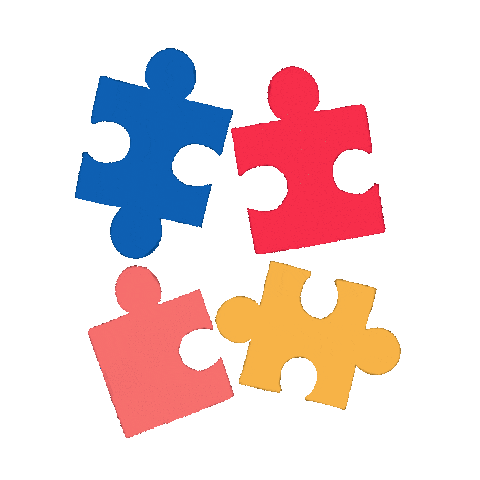
I must admit that the puzzles have come a long way since those first few and I am now able to personalize them in ways that make it even more fun for the children.  I've added my Bitmoji and the one of my little dog Ruffles.  I use the "group" function to put images together for my puzzles.  You can do this with any number of images and a variety of personalized touches including personal photographs of children's work.  The options are endless!The puzzle that I am sharing today relates to some early work that I do with the calendar.  Learning about the calendar in the primary years has been an on again, off again set of standards but I have always taught it.  In addition to helping children find their place in time; it is also an excellent segue to many a math concept.  This puzzle is just the trivia that helps children connect the times together in ways that help them understand relationship between days, weeks, months and years.  
You can use it as part of a centre or as an exit ticket after you have taught a lesson about the relationships.
Tip #5:  Coming Soon!You are going to want to be able to make your own and edit the ones that I have.  Should this concept and the creation of it be a little foreign to you, please stay tuned as I will put together a how-to video in the days and weeks to come. 
Tip #6:  Making Your Own FileI have made all the links to files in this Blog, "View Only."  You can make it your own by going up to your File menu and choosing "Make A Copy."  This will enable you to make an editable version of the file that you can create as your own, name as you like, and work with.  Click on the link in the title to get to this puzzle.  


Thursday 24 June 2021

Planning For September - Start With The End In Mind

"To begin with the end in mind means to start with a clear destination.  It means to know where you're going so that you better understand where you are now and so that the steps you take are always in the right direction"
Stephen Covey
American Educator and Author
"7 Habits of Highly Effective People"
Bonneville Elementary School


 This September will be my 6th year of returning since I was off for 5 years on disability.  At that time, no medical professional (and I had many), family member, friend... thought that I would ever return to life let alone teaching.  Then, by some miracle (of medical science and purely spiritual proportions), I started to get better!  I returned to teaching; nervous like a first year teacher and afraid that I had forgotten how to do it.  So, I started planning in the summer.  I reviewed curriculum and set academic goals and started the first day of school teaching standards.  I was ready to make these kids academic superstars.  It was a good year and the kiddos did well, despite that.  Thanks to an incredible teaching partner who was hired to shadow me as I returned and teach the portions of the day I was too tired to handle, I learned that I had made some colossal mistakes in the planning that I did.  I hadn't considered the community, the routines, the procedures... that all come as part of the day.  So, I was constantly back tracking to teach all of those things.  Recently, I have had the distinct pleasure to get to know someone else who is returning from a similar leave.  That teacher started the way I did.  Planning academic programs and reading curriculum.  That's what made me think that we are probably not alone.  Then, I read many threads on some superb teaching and learning Facebook groups where teachers were planning for the upcoming year.  They were talking about colours and themes and classroom set-ups.  These are all important but as years have progressed from the first year since my return, I have thought more and more about what actually needs my preparatory attention.  I have returned to some old workshops that I had about Design Down theory (called a whole bunch of different things now but probably most common - Universal Design).  With all that in mind, I spent the last few weeks looking at my current students.  I have been looking at what I like about the way the class is working and things that I might like to see differently.  Every student and every class is different but there are some commonalities based on what I think is important in a learning community.  This year, 6 years later, I am going to do it right.  I am looking at what I want the end of the year to look like and considering what needs to be taught and experienced and learned (by the kiddos and I) in order to get there!


Terrain (Level of Difficulty):  💖💖💖💖💖


Kit List:
  • notebook
  • coloured pens
  • beginning list (Thank you Mrs. B at TpT for this free resource)
  • your current classroom 
  • a classroom of a colleague (that you agree with or not)
  • poster paper, chart paper, computer
  • elastics


The Map:

I want to repeat this to ensure that my message is clear about this.  No kiddo and no class is ever the same and what works one year has failure written all over it the next year if the new kiddos are not considered!  Remember that you teach kids first and then curriculum - not the other way around!  Having said that, there are some tried and true routines that have worked for me over the years with simple tweeks for the needs of the kiddos.  

I worked on contract for IBM in the days of SchoolVista (an awesome interface and set of apps that the kiddos loved) for a couple of years.  They would pay me and the supply teacher and fly me all over Canada and the United States to teach teachers how to use the interface and program computers into their days.  It was an awesome experience and right at the birth of technology in classrooms.  The reason that I bring this up is because of a transformational memory I had of a visit to Regina, Saskatchewan that I had.  In those schools, principals required that teachers not only post but submit their "procedures" before the beginning of the year.  Seems like a lot of work?  Those teachers confirmed that it was but they also talked about how much less behaviour and back tracking they did during the year as a result.  They also talked about how working with colleagues helped and that it didn't matter what grade (from kindergarten to 8) they were teaching, the procedures were still quite helpful.  The first month of school each year was spent in lessons about how to follow those procedures and often, the children helped to co-create better ones that were then re-submitted by the teacher.  I thought that was amazing and I have done that to lesser amounts since but I think that going the whole way makes much more sense. 

So, let's begin.  Get out your notebook and title it for the year.  I tend to refer back to my notebook all throughout the year for ideas.  It is strictly ideas, thoughts and quotations that I want to remember and develop throughout the summer and through the year that help me to continually reflect and improve my practice.  My notebooks have loose papers folded in them and elastics to hold the paper in.  They are not my neatest work at all (Sorry, to my grade 4 teacher who insisted that everything should be neatly recorded!).  


My 2020-2021 Notebook


It's a lot like mind-mapping, the work that I do.  In my first stages, I like to just throw it all on the paper.  Later, I will frequently return, rewrite and use colours to help me keep similar ideas connected.  I am as old as the dinosaurs (just ask my kiddos) so I find the act of writing with pens on paper helps me to think and remember and create.  You might prefer the computer or a mind mapping piece of software.  Do whatever feels right for you.


1.  Start at the end of the year by looking at your class or a colleague's class.  When you watch the kiddos learn and work together/independently, what do you like about what you are seeing?  What would you pay more attention to or develop better.  You might do both.  One of my favourite colleagues is someone who has a polarly opposite approach to teaching than I.  We both agree that if we had to team teach together we might kill each other.  We also both agree that our different approaches help some kids in ways that one or the other of us can't do as well.  So it doesn't matter who you look at.  In fact, I think working together at the brainstorming with your division or a group of colleagues might be even more fun.  I am picturing a living room and chart papers all over the floor with markers, wine, a little music, and my favourite people.  I can't imagine a more fun way to do this!

2.  I usually like to start with the 3 headings that are most important to me - community, independence, and learning.  You can add headings or change them to whatever suits your style.  Then it is all about your mind mapping skills.  I like my Flair Pens to do colours.  Don't forget to add what you liked that you saw with any notes that you think go with why something worked or didn't and what you didn't like.  I have started the process (see below) but will need to do more thought and review as time goes on.  You'll notice that I put boxes around things that I think need further scrutiny because it wasn't as successful as I hoped.  For example, I talked ad nauseam about making mistakes and the furthest we got with that type of risk taking was the children making silly mistakes on purpose.  That is a first step and I'm happy about that but I need to think further about the kind of risks that I want them to take and my responses to them.  Another thing, I need to consider are my responses when the kiddos offer and idea or an answer.  At this point, even when I am not trying to, I give too much away and value the correct answer aloud so the children are picking up on that.  

The above image is far from complete and as I work more at it (adding pages and ideas) I will add the images later but I think many people might be getting started already so I wanted to show where I am at.

3.  The next step is then the research.  Through excellent Facebook groups of teachers and my own checking, I have been able to amass a number of reference books for my reading "pleasure" over the summer. I picked books related to the things that I identified as issues for further consideration.  I'd suggest that you pick one or two goals to concentrate on.  There are also many professional development opportunities that are free around the internet and courses you can pay to take for accreditation.  In Ontario, we call these courses AQ (Additional Qualification) courses.  They are usually term courses and offered online so they are expensive but easy to access and can be done on your schedule.  Don't forget to keep your notebook handy so that you can take notes and makes references that you would like to consider and return to.  

4.  Finally, and most importantly, is the planning and I would like to caution you to be very careful!  It is in our nature as teachers to over plan and that can be a good thing but it can also be a waste of time.  I try to focus on the principles (I'll talk more about how I structure those first few weeks and my principles in a later blog.) that are necessary for me to teach and learn in the well oiled machine I call my classroom and the first couple of weeks.  I don't do too much curriculum planning over the summer other than to make a spreadsheet of curriculum goals that I can use as a checklist for each child as I am assessing.  I will talk more and share more about my student portfolios in a later blog.   You might like to use the chart that I have included below for that planning and prioritizing. 


Tip #4:  Imagery
If you are at all like me, photos and videos and pictures help.  Sometimes the photos and videos look a little bit too utopian.  I don't worry about that!  I use what I see and hear that applies to me as ideas.  In addition, and you'll notice this in the spreadsheet, I think about what it looks, sounds, and feels like for me and the children in the classroom.  This helps me to think about how to communicate with students about what my end goals are but it also helps them to communicate with me about whether or not it looks, sounds, or feels that way to them.

Adventure Recipe: Resources
In this blog entry, I have talked a lot about the resources that I have and use.  In truth, this list can be exhaustive and I think that I will put together a file that lists all of the pertinent resources but for the purposes of this entry, here is what I might consider.


  • "The First Six Weeks of School" by Paula Denton and Roxann Kriete

  • Facebook Groups
    • Bitmoji Craze For Educators
    • Not So Wimpy ______Grade Teachers (I have first and second)
    • Lucky Second Grade Teachers
    • Pixel Art Mysteries In Education
    • Build Math Minds
    • Rooted In Reading Teachers
    • Teacher Talk With Lyndsey Kuster
    • Google Classroom For Kindergarten and Primary Teachers
    • Free Teacher Powerpoints and Slides
    • Teaching With Neons
    • Simply skilled Teaching Group
    • Cierra Harris Teaching

If you have other resources or ideas, please feel free to add a comment below.  If you have a mind map or chart that you'd be willing to share a photo of, please share that below as well.  

#Bitmoji Craze For Educators, #Build Math Minds, #Rooted In Reading, #Cierra Harris, #Not So Wimpy Second Grade Teachers, #First Six Weeks of School

Sunday 20 June 2021

Magic Story: The Best Part of Me (Wendy Ewald)

"We should embrace what makes us different, our different styles, 
our creativity."
Chantelle Brown Young
Canadian model, Vitiligo
                     Home School (to escape bullies), Mississauga, Canada  


 One year, I was transferred to a new school and began teaching grade 6.  It was early on in my career and I was getting bounced all over the place due to surpluses and redundancies.  My first day with this group was a real eye opener!  They were children who demonstrated zero confidence or appreciation for the great kids that they actually were.  About 20 minutes into the first day, a student burst into the portable and was met with a chorus of giggles and taunts and teasing.  I was horrified!  Standing before me was a young boy, small in stature.  He had old, torn clothes, no backpack, and he was obviously in need of some personal care.  He had a mouth full of teeth that protruded and when I smiled at him and he smiled back, I noted what a sweet young man he was!  His smile lit up his face even when I know how hard he was holding back his tears.  I worked really hard at trying to pull that group together and help my little friend fit it.  In fact, I taught them for 3 years.  I was so thrilled when he found a little group of boys that he felt comfortable with and I used to happily remark how they played together and teased each other in much more supportive and comfortable ways.  Once I said to him, "You are a great person and I really like having you in my class."  His response was quiet and sullen.  "There is nothing great about me!"  It was at that moment that I realized that my best efforts with him were not going to improve his academics if I didn't help him see that he was capable, powerful,and awesome.  In fact, I realized what I had always known but rarely purposefully and reflectively planned about.  If a person doesn't feel adequate... better yet, worthwhile, there is little chance that any of the learning that occurs will have much effect.  

Terrain (Level of Difficulty):💖💖💖

Kit List:
  • "The Best Part of Me" by: Wendy Ewald  in the Magic Story bag
  •  Magic Story Bag
  •  photo album with sticky pages (not slots)  in the Magic Story bag
  •  student use camera or phone  in the Magic Story bag
  •  blackline masters for students to complete (free)  in the Magic Story bag
  • pencils, crayons, markers...


The Map:
                                                     
 
I have a scheduled time each week for Magic Story but in the first month of school, I like to have a Magic Story everyday.  This builds the enthusiasm, magic and excitement for Magic Stories to come.  It also helps take that community building that we all do at the beginning of the year to the next level - from "Oh no!  More school work!" to "Wow! This is school work?"

Before I begin, I think it is important that you know the basic background of the story that I tell.  The Magic Backyard, for me, is a place where all the characters of all the stories of all the world live.  Each time I go there, one of the characters will fill my bag with their story and a little gift for the children to help them remember the story.  This was how I started and as you will see with each new blog post, it has turned into a whole way of thinking and doing in my classrooms.  In fact, each year, my students decide whether they would like to be an official Magic Backyard class and fulfill the responsibilities of it.  More about that another time.  

I always hang my Magic Story bag where the kids can see it and where they don't have ready access to it.  It is a good time to explain to children about personal property and respect for it.  I use my Magic Backyard to back me up instead of making it another lecture.  For example, I go over the history of the Magic Bag and how I received it when I was very young and only I hold the key to the Magic Backyard.  All the characters of all the stories of all the world have entrusted me with this bag and this key and it is really important that I keep both safe.  In addition, I would feel sad if the characters in the Magic Backyard felt that they couldn't trust my kiddos and decided that stories would not be offered this year.  "I know this is the same with your special things too," I tell them.  "We all need to be very careful to respect the trust and special-ness of each of our personal items."  It is important in these first few days with your Magic Story bag to be able to sell it.  My story has grown over time and often based on the questions of the children.  (Remember what you build on your story though because if you stay at the school, future siblings will test you!)


This is probably a good time to talk about older students and how they respond!  My father taught high school from before I was born.  We have always talked about how people of all ages enjoy magic and fun.  He had stickers and stamps for his students and when I went to the same high school, I used to hear all of my friends rave about which ones they got.  I've taught, now, all of the grades from kindergarten to 8 in regular classes and special environments.  I have never forgone my Magic Story bag or my story.  My grade eights tested me a whole lot less than the grade 1 students that I taught this year, in fact.  Of course, you want to change the direction a little but my grade 8 students cheered as loudly as my primary students when the bag came out and we all sat down to enjoy a story together.  It's about how you sell it.  
Note:  I posted my first blog to FB last week and both a former school custodian and a former grade 7/8 student commented that they remember the Magic Backyard and really loved it.  I worked with both of them more than 15 years ago.  

When, it's story time, I gather the students around me.  We don't sit in chairs and desks for stories.  It's a great time to come to the carpet, go outside, or go to another cozy place in the school to read our story.  I take out only the book to start and I read to the students.  I have learned the power of allowing children to interject when they think of something that they feel or connect to...  It's shared reading in the best way.  There are no comprehension questions or boring activities to go with the story.  I read, sometimes they help, and we all enjoy the words and their collected messages.  

After the story, I always like to ask a leading question if the children didn't get there on their own.  For this one, I always say, "It's too bad there aren't more pages because I have some great ideas about the best part of me.  What is the best part of you?"  This sparks all kinds of discussion and I often give children an opportunity to freely talk to each other about their ideas.  Then I will say without calling for their attention specifically beforehand, "Hmmmm!  I wonder what the children from this book sent us as a gift."  I can usually count on immediate attention back to the bag.  That's when I take out the photo album and let the children think about and discuss what they think we should do with it.  Then we take out the camera which is usually a big hit.  Finally, I take out the blackline masters.  Other than cries for "How do you spell...?" I can often hear happy students talking about what they are writing and working together to take pictures of each other.  It's one of those magical and powerful parts of my day that help me to go home feeling good about what was accomplished!


Tip#2:  Your Story Time:  I am getting pretty good at thinking on my feet with regards to my Magic Backyard and Story Bag.  At the beginning, though, I spent some time thinking about what I wanted to share and how I would answer questions.  When you begin, you may not have all the answers to their questions and you may not know your direction yet.  That is absolutely okay!  Many times, when challenged, I have answered with, "that is a question to be answered later" or "I will have to check to see if that's something that the characters are willing to share now."  Sell it and usually you will get some begging but I have had little problem putting the children off until I figure it out.  

It wasn't until I had been teaching the Magic Backyard for more than 20 years that I found myself, again, having to scramble for an answer to a question that I had never been asked and wasn't prepared for.  I was teaching in a small class of children who had varying and sometimes very limiting learning differences (in Ontario, they are called students with developmental delays but I hate that term).  One of my little ones with all kinds of excitement asked me, "Where is your key?  Can we see it?"  Oh no!  I didn't have a key on my ring and no one had every asked me that.  I used my line, "I'll have to check to see if that is something that I am allowed to share first."  That night I went scrambling out to find an old, antique skeleton key which I put on my ring for our next Magic Story.


Tip #3:  Read and Repeat:  The Magic Stories have become some of the best loved stories with my kiddos.  While I don't leave those books out for children to look through on their own, we do refer to them in other lessons frequently, reread them...  Here are some things to think about to help keep a record and enjoy the stories throughout the year.
  • Create a bulletin board where you can keep track of the stories that you have shared with an interactive portion where the children can mark their favourites or write what they liked about a story.
  • Reread or repeat a story when the message could stand a quick review or rethinking of strategies.  I do "The Best Part of Me" three times throughout the year and keep all of their responses in the book.  It's a great record of how writing has improved but also about how they have grown and changed.  You will note 3 different templates in the files for different stages of writing.  I tend to use the first one in September, the second one in January, and the the third one in June with primary students.
  • Keep your own treasure box of the gifts that are received in a place where the children can see that you think they are special too and can remember them.

Adventure Recipe:  Looking for a quick organization of the lesson?  Check out this resource to help you plan your Magic Story time.


Thursday 17 June 2021

The Journey to the Magic Backard (Introduction)

"Sometimes it's the journey that teaches you a lot about your destination."
                  Drake
                     Rap Music Artist
                            Weston Memorial Junior Public School


When I was just 13 years old, it was obvious that the best use of my talents and my best money making opportunity would be in babysitting.  I'm not clear anymore (that was a dinosaur's age ago) who taught or sponsored the course but I have been forever grateful to them and my parents for making sure that I took it.  One of our assignments, and the one that has lasted with me all these years, was to create a bag or a box that would be our toolkit when we babysat.  Having helped my Mom with Brownies and being the creative person that I am, I rushed out to get some fabric to create something fun and unique.  It was then that the Magic Story Bag was created and the myth of the Magic Backyard began.  I say that I got the key from my parents because I did.  Right from my early years, they recognized my skills with children and my creativity.  They helped me develop it and have supported me along every adventure I have been on in search of the Magic Backyard ever since.  In it's early stages, the Magic Story Bag held a book with a gift/craft/activity related to the book that was personally sent to the children by one of the characters in the book.  It is the questions of all those children over the past years that has helped me to define more clearly that which I seek and that which I share."

Ye Olde Magic Story Bag
Circa 1983
 
Terrain (Level of Difficulty):  💖💖💖💖💖

Kit List:  
            To start, I recommend making, finding, co-creating your own Magic Story container.  You can name it whatever you like and you can choose to go to a different land.  Be as creative as you can and remember that the best teaching and learning adventures come from your own passions and knowledge.  Use what you know and what you love.


Your Invitation to the Adventure:
    

If you have landed here by some accident, referral or because you know me... you might be asking yourself, "What is this Magic Backyard?" and "Who is she who represents it?"  These are all questions to be looked at in greater detail as time goes by.  I think if you are a parent or an educator, this journey might be interesting, educational and fun for you.  If you are ready for the magic of working with kiddos, then let's look at what's involved.


Should you choose to embark on this journey, BE PREPARED!  It's an adventure of great magnitude and a lifelong pursuit and vocation. It will have many challenges and many levels.  You will be tested in every way - mentally, physically, and spiritually.  You will experience times when it would be easier to quit than push on!  There is no GPS and the destination is so mysterious and illusive that you may never truly arrive there.

Should you choose to embark on this journey, it is best that you accept that it is the journey that is more important that the destination.  You will need many tools and your backpack will be heavy.  Don't worry!  You can pick up new tools and discard others along the way.  Wise adventurers will do that!  You will need to be shrewd and smart and very strong!

Should you choose this journey, I will be your guide.  I have a map and some ideas to help you.  But, you will choose your own route, your own tools, and your own method of travel.  

So are you coming?  Let's get started!  Where are we going?  We're headed to the Magic Backyard, of course.  I am Lisa Moffatt and I will be your guide!


Tip #1:  The Bag/Box:  While your talents with sewing and building may not be stellar, it is important that you choose materials and a size that will endure a whole lot and fit what you need to carry.  I took the largest book in my library to measure for what I needed and left width to fit props, gifts, craft materials...  Ye Olde Magic Story Bag is the one that I still use!  It's part of the myth and the magic.  I think, in my case, it is appealing because it looks old and hand-created with lots of sewing mistakes and, now, a little bit of filth from the ages.  The bag started my creative juices flowing and helped me put all of my philosophy into a "bag" that fits together.  For the children, it is part of the lesson.  For me it has become a symbol of what I believe in as an educator.  I would love to see photographs of the bags, boxes, baskets or containers that you make or use.  Please feel free to share!


Adventure Recipe:  Looking for some resources to help you start thinking about your myth and magic and philosophy?  Check out these resources.

  •   "Teach Like A Pirate,"  by:  Dave Burgess
  •   "Dictionary of Imaginary Places" by Alberto Manguel and Gianni Guadalupi


Puzzle Fun #3 - TouchMath Adding (Iditarod)

  In this Blog, you will find instructions for how to use TouchMath to move students from "counting all" to "counting on.&quo...